Hiney The Other
Hiney The Other is my attempt at cloning Russian River’s Pliny the Elder (PTE) Imperial India Pale Ale. PTE is one of my favorite IIPAs, and is also next to impossible to get in my neck of the woods. My first attempt at making Hiney The Other was as what’s called a mini-mash: steeping grains are combined with pre-made malt extract and hops in a single kettle. While it came out pretty good, I really wanted to try it as an all grain brew. It’s a big grain bill at 16lbs of grain and an even bigger hop bill at 17oz of five types of hops, all for a single 5gal batch.
I started off the brewing day by conditioning and milling the grain. Conditioning the grain is done by spraying about 2% by weight water, in this case a little over 5oz, onto the grain and mixing thoroughly. This small amount of water helps soften the grain husks, and helps keep the husks intact for a better lautering bed. I then ran the grain through my Monster Mill MM3, and just about filled my 5G grain bucket with the milled grain.
Next step was to take out two vials of White Labs WLP001 American Ale Yeast from the refrigerator, and place them on the counter to warm up.
Next it was time to move all of the equipment from storage to the back patio: mast/lauter tun (MLT), boil kettle, wort pump, hot liquor tank, burners, propane tanks, scale, immersion chiller, various and sundry hoses and clamps, ingredients, timer, table, water, and my steam infuser.
Next up was setting up my kettle to heat strike water, and my steam infuser. The kettle is a 50qt aluminum kettle That I purchased from Sam’s Club on-line. It’s large enough to boil up to 9gal of wort without worrying about boil-overs, which is just fine for doing 5gal batches of beer. I fitted it with a weldless fitting, a stainless steel 1/2″ ball valve, and a copper dip tube. I filled it with 5gal of Sam’s Club Spring Water, added some ph buffer, and placed it on my burner, and fired it up. The water needed to reach 168 degrees before I could begin brewing.
The next thing to set up was my steam infuser, a 21.5qt All American Pressure Cooker/Canner. I found one practically brand-new on Craigslist for cheap. I added a “T” and a 1/4″ ball valve to the tapped opening for the pressure meter, which I use to run steam at 250 degree steam into my MLT to control mash temperatures. The ball valve connects to a check valve and 3/8″ soft copper steam manifold in the MLT via high temperature silicone hose.
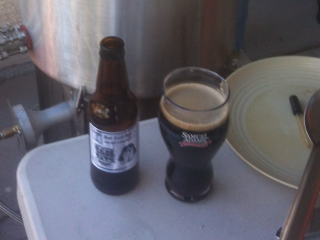
Once everything was up to temperature, it was almost time to get started. First, I made a sacrifice to Ninkasi, Sumerian Goddess of Beer, by opening one of my Dark Side Vanilla Bean Porter homebrews, and drinking it during the course of the brewday. Next, I transferred the hot water from the kettle to my MLT, made sure the water was at the proper temperature, and started adding in the 16lbs of milled grain, stirring as I went to avoid any dough balls. Now it’s time for a check of the temperature of the water/grain mixture, now referred to a the mash, which should be about 152 degrees. Perfect. Time to start the pump.
I use my wort pump to constantly recirculate the water over the grain in the MLT, in order to maintain an even temperature throughout the mash. It also helps to evenly distribute the starches that are slowly being converted into fermentable sugars by the enzymatic action of the grain.
After about an hour, I’ve determined that most, if not all, of the starch that was present in the grain has been converted into fermentable sugars. Time to stop the enzymatic action by raising the temperature of the mash to about 168 degrees, and transfer the wort to the brew kettle. During this time, I’ve also heated up another 5gal of water which Im going to use to extract every bit of sugar possible from the grain. This process is called sparging, and can be done several different ways. The method I’m using today is called batch sparging. Once the first wort, called a running, is transferred to the brew kettle, I add the 5gal of water that I heated up to 168 degrees during the first mash process. I circulate the water through the grain for about 10 minutes, and then transfer the second running to the brew kettle. The grain has absorbed about 2gal of the original 5gal, so the total volume transferred to the brew kettle is about 8gal.
Now it’s time to start boiling the wort, boiling kills any micro-organisms that might otherwise spoil the beer, and also allows me to infuse the wort with the hop flavor that helps make beer taste like beer. Since I’m reducing the 8gal down to a 5gal batch, the boil time will be about 90 minutes.
While I’m waiting for the wort to start boiling, I get my hop additions weighed out. I’m using three hop additions: Warrior and Chinook hops as soon as the wort starts to boil to add hoppy bitterness to the beer, Simcoe hops at 45 minutes for a citrusy/piney flavor, and Nugget hops at 15 minutes for floral flavor. I’ve also taken a small sample of the wort to see if the sugar level is where I expected it to be. I do this using a refractometer, and I’m within two points of my expected value. so far so good.
At the end of the 90 minute boil, known as flameout, I add yet another hop addition, this time for aroma. For this I’m using more Simcoe hops for a citrusy/piney aroma, and Centennial hops for more citrus notes. The reason that these hops are added at flameout is to avoid boiling off the volatile oils that produce the aromas. I allow the wort to sit for about 20 minutes to infuse with the hop oils.
It’s now important to get the wort down to a temperature suitable for the introduction of live yeast as quickly as possible, to avoid the possible introduction of unwanted micro-organisms. To do this, I use an immersion chiller to reduce the wort from its current temperature of about 180 degrees down to about 80 degrees in about 15 minutes. Once the wort is cooled, it’s transferred to the fermenting vessel, called a carboy. The carboy will be the wort’s home for the next two weeks or so. After transferring the wort to the carboy, I took another refractometer reading of the wort. This reading is called the Original Gravity, or OG, and is used to determine the beer’s Alcohol By Volume, or ABV, when fermentation is completed. It’s within a few points of the expected OG, so all is going well.
The next step is the introduction of the player that will convert the sugars in the wort to alcohol, carbon dioxide, and various other compounds called esters that make beer taste like beer. That player is yeast, in this case White Labs WLP001 American Ale Yeast. I oxygenate the work with a shot of pure oxygen through a stone diffuser, add the yeast, and place the carboy in the fermentation chamber, in this case a converted chest freezer.
Now starts the wait…
Day 8
Day 15
Moved the brew to a secondary carboy today. ABV stands at about 8%, and flavor is good. I’m going to let it sit for another week, and then dry hop it on two separate occasions with Nugget, Centennial, and Simcoe hops. Then it’s time to add priming sugar and bottle.
I’m also trying to recapture the yeast the formed by the fermentation for later use. Here’s a really good pictorial guide and discussion about the process at HomeBrewTalk.com.
Day 22
Dry Hop Day!! I took a 1gal paint strainer bag, soaked it in vodka to sanitize, added 1-3/4 oz each of Simcoe, Centennial, and Nugget hops, and a stainless steel ball bearing to help keep the bag submerged in the beer. Dropped it all in the carboy, and now I’ll wait 7-14 day to add priming sugar and bottle.
Day 35
Bottling Day!!
I got together my bottles, Starsan sanitizer, priming sugar solution, bottling carboy, trub/hop filter and got to work.
I make my priming solution well in advance, and pressure sterilize it in pint jars in my pressure cooker. That way come bottling day I just open a jar of priming solution, add it to the bottling carboy, and transfer the beer.
I took the secondary carboy out of the fermentation chamber, added priming sugar to my bottling carboy, hooked up my trub/hops filter, and transferred the beer to my bottling carboy. I also took a few ounces to taste: nice aroma, great hoppy flavor.
Next I sanitize my bottles using Starsan solution and a bottle sanitizer/rinser. This sends a jet of sanitizer solution into the bottle, which will kill any nasties that may have crept into the bottle. The sanitizer works as long as it’s wet, so I normally do about 2 dozen bottles at a time.
Using a spring loaded bottle filler, I fill the bottles, automagically leaving just the proper amount of headspace in the bottle.
After I’ve filled the bottles, it’s time to cap them. I paid a little extra and got a Colonna Bottle Capper and Corker. This baby is great. It’s easy to use, can be adjusted for various bottle sizes, and can also cork wine bottles and Belgian Ale bottles. Definitely worth the money. I also used my custom printed bottle caps from BottleMark Custom Caps.
Now I move all of my bottles to my “Bottle Bomb Shelter”, a 100 quart cooler, to allow the bottles to naturally carbonate. This way, if I’ve miscalculated the amount of priming solution, or have a bottle failure (try “beer bottle bombs” in google for examples), the cooler will contain the mess. This saves endless hours of cleaning, and argument with SWMBO if a bottle bomb occurs.
Now just have to wait a couple of weeks to try the final product.
Day 50
Tasting Day!!
I put a bottle in the fridge in the early morning, and waited until about 5pm for the taste.
Poured into a standard pint glass, the beer is a golden color with a tinge of orange, with a noticeable amount of chill haze. The head is slightly off-white with decent lacing. The nose is citrusy, but not as pronounced as I would have liked, so maybe next time I’ll double dry-hop.
First sip has lots of citrus and pine, medium mouthfeel, and a slightly sweet finish, probably due to the larger amount of non-fermentables I included in the grain bill. Nice long bitter finish, which I prefer. My wife tried it, and said it reminded her of Dogfish Head 90 Minute IPA.
Overall a very nice, drinkable IPA.


